Lesson summary
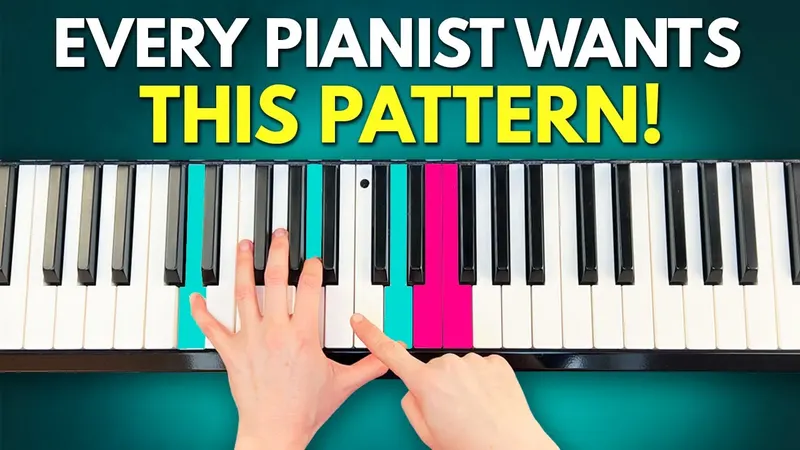
The chords are A minor, F major, G major and E minor, two bars each, counted 1 2 3. Your left hand splits each chord: the root on beat 1, the third and fifth together on beats 2 and 3. That's the classic waltz feeling. Your right hand starts with only the root, then root and third, then root and fifth, and then any chord note you like: your first free improvisation.
- How to count and feel 3/4 time
- The classic left-hand waltz pattern
- When to change the sustain pedal
- Melodies from the root, third and fifth
- A first free improvisation with chord tones
- Letting a note ring over the chord change
Before you start
The triads A minor, F major, G major and E minor. Each triad has a root (the note it's named after), a third and a fifth. 3/4 time means three beats in every bar.
An acoustic piano or a digital piano with a sustain pedal, which makes the waltz sound more beautiful.
About 10 to 15 minutes a day. Get the left-hand pattern steady first, then add one right-hand idea at a time.
Step-by-step guide
Here's what the video covers, in six steps. Click a time to jump straight to that part.
-
The chords in 3/4 time
Your left hand plays A minor, then down to F major, up to G major, and down to E minor. Count in 3/4 time: 1 2 3, 1 2 3. That's the foundation.
AmFGEm
-
The waltz pattern
Split each chord: on beat 1 play the root, and on beats 2 and 3 play the third and the fifth together. Play each chord for two bars before you change: 1 2 3, 1 2 3. Now you have the classic waltz feeling.
-
Add the sustain pedal
Press the pedal down when you play the first note. When you change the chord and play the new root with your pinky, the pedal goes up and down, very quickly. Also try to play beat 1 a little louder: then it starts to sound like a real waltz.
-
The right hand plays the root
Your right hand takes the same chord shapes: A minor, F major, G major and E minor. Prepare each shape, but only play the note under your thumb, the root, while your left hand plays the waltz pattern. Then move both hands to the next chord.
-
Melodies from root, third and fifth
Now play the root in the first bar of each chord and the third, the middle note, in the second bar: A then C, F then A, G then B, E then G. Then try root and fifth instead, the lowest and the top note of the chord. It sounds dreamy and open.
-
Improvise with chord tones
In the right hand, choose any note of the chord: the root, the third or the fifth. You can't really play a wrong note here, so experiment and let your ear guide you. Then play the three notes one after another, going up, like A, C, E, and let the last note ring while your left hand changes the chord. Do the same with G, B, D. If you're more advanced, add notes and change the rhythm.
 Ready to move from exercises to music?Modern Piano 1My course Modern Piano 1 is for players who know the basics a little and want to truly make music: how to build patterns, use chords confidently and improvise in an emotional, natural way.Learn more about the course →
Full transcript
Prefer to read along? Here's everything I say in the lesson. Click a time to jump to that moment in the video.
Video transcript · about 2,100 words
Welcome to the new piano tutorial
Imagine you are sitting at the piano and you start playing something that sounds like it's straight out of a romantic movie. Flowing, elegant, and almost like it's dancing. Today I brought you a really beautiful exercise. We are going to play a small waltz. It's perfect for improving your feeling for rhythm, and it's also a lot of fun.
If you are new here, my name is Melanie. I studied music education, and on this channel I show you all the things that are often missing in traditional piano lessons, and I share all the exercises I wish I had known earlier. So, make sure to subscribe to the channel and give this video a thumbs up.
And by the way, you can also download the sheet music for this tutorial for free. Just check the link down in the video description below. I personally love having the sheet music printed out, and you can also write notes to keep everything organised. So grab the notes, sit down at the piano, and then let's get started.
The chord progression
So let's have a look at the chords first. In the left hand, we start with an A minor triad. Then we go down to F major. Then we go up to G major. And then we go down to E minor.
Counting and feeling 3/4 time
So now let's count in 3/4 time together. So that means we are counting 1 2 3, 1 2 3, 1 2 3, 1 2 3. Again: 1 2 3, 1 2 3, 1 2 3, 1 2 3. Okay, that's our foundation. And now let's turn this into a beautiful waltz.
Creating the classic waltz pattern
Okay, now we want to have the typical waltz feeling, you know. And for that we split the chords. Look, every chord has a root note, a third and a fifth. Okay? 1, 3 and 5. And now we split the chord. So on beat 1 we play the root note, and on beats 2 and 3 we will play the third and the fifth together, like "2 3". So it becomes 1 2 3, 1 2 3. Okay.
We will play each chord for two bars now before we change to the next chord. That means on A minor we play 1 2 3, 1 2 3, and then we go to the next chord, to F major. And there we are doing the same thing. 1 2 3, 1 2 3. Then we move up to G major. 1 2 3, 1 2 3. And then in the end, two times E minor. 1 2 3, 1 2 3.
And now we finally have that classic waltz feeling, like in music by composers such as Chopin and so on. And maybe you've even danced a waltz before. You know, here in Germany, almost every student takes a dance class before their graduation ball, and that's usually where you learn how to dance the waltz. But I have to admit that I never actually took a dance class, because I was always too shy for that. So instead of dancing the waltz, I played it on the piano.
Right. So let's try this out a second time. So we begin on A minor. I will count you in. 1 2 3, 1 2 3, 1 2 3, 1 2 3, 1 2 3, 1 2 3, 1 2 3, 1 2 3, 1 2 3. Wonderful.
Using the sustain pedal
And of course, it's really important that you don't forget to play with the sustain pedal, because that makes it more beautiful. So, press the pedal down when you play the first note. 1 2 3, 1 2 3. And when you now change the chord and you play the F with your pinky, the pedal goes up and down. That really happens quickly. Right. Next chord. As soon as I press the G down, the pedal comes up. Up, down. Up, down.
Yeah. Up, down. Up, down. Up, down. Up, down. Yeah. So, really try this out, to play this with the pedal. And then what you can also try is that you always play the 1 a little bit louder, like 1 2 3, 1 2 3, 1 2 3, 1 2 3. Because like this it starts to sound like a real waltz.
Introducing the right hand
Okay. All right. Now it's time to add the right hand. And here we will take the same chords as we played in the left hand. That means we start with an A minor triad. Then we go to F major. Then we go to G major. And then we go to E minor. Yeah. Repeat this a few times, so that you get the shapes under your fingers.
And now we do a trick. We always only play the thumb note of the chord. Okay? The root note. That means when we have A minor, then you just play the A with your thumb. Then you move to the next chord shape, to the F major, but you only play the root note with your thumb. Then you go to the next chord shape, which is G major. And here also you only play the thumb. And then you go to the last chord shape, to the E minor. And there also you only play the thumb.
Playing both hands together
Now we will play both hands together. That means the left hand plays the waltz pattern now, and the right hand just plays the root notes for every chord. So when we start with A minor, we prepare both hands for the A minor triad. Okay? And then we are starting, in the right hand just the thumb. 1 2 3, 1 2 3. And then you go to the next chord with both hands, to the F. Okay? And then you only take the thumb. 1 2 3, 1 2 3.
Now move both hands up for the G major triad. And then in the left hand the pattern, and in the right hand just the thumb. 1 2 3, 1 2 3. Now move both hands for an E minor triad. And then 1 2 3, 1 2 3. Again. Okay. So a little bit faster. 1, 2, 3. 1, 2, 3. 1, 2, 3. 1, 2, 3. 1, 2, 3. 1, 2, 3. 1, 2, 3. 1, 2, 3. 1, 2, 3. Wonderful.
A melody from the root and third
Now, let's make the melody for the right hand a little bit nicer. Now the right hand plays the root note in the first bar, and in the second bar of the same chord, just play the third instead. So remember, every triad consists of a root note, a third and a fifth. And now we play the root, and then in the second bar the third, the middle note.
Okay. And then we are changing to the next chord, to the F major. And here also we start with the root, and then in the next bar we are playing the third, which is the A. Then we go to G major, and there also we start with the root note. Then we play the third with the middle finger. And on the last chord also, in the first bar just the root note, and in the second bar the G.
Okay. All right. Let's try this out. So make sure that you prepare your hands for the A minor triad in the left hand and also in the right hand. And then we are starting with the thumb in the right hand. 1, 2, 3. Now the middle finger. Next chord. Both hands to F major. 1 2 3. Now the middle finger. Both hands take the position for G major now. And now thumb, middle finger. Now go to E minor. And then also thumb, middle finger.
Okay, let's do this a little bit faster. 1, 2, 3. 1, 2, 3. 1, 2, 3. 1, 2, 3. 1, 2, 3. 1, 2, 3. 1, 2, 3. 1, 2, 3. 1, 2, 3. Wonderful. And by the way, don't forget to download the sheet music. It's completely free, and the link is in the video description below. Just print it out and put it on your piano, and you will be able to follow along much more easily.
The full waltz with root and fifth
And now let's make it even more beautiful. Instead of root and third, we play root and fifth as our melody. So for A minor, we play the root in the first bar and the fifth in the second bar. Okay? So the lowest note and the top note of the chord. And you will repeat that with every chord. That means on F major you are also playing the root, and after that go to the fifth. On G major also: place your hand for the G major triad, and then root and fifth. And on E minor also root and fifth. Okay.
Let's do this with both hands together. First check your hands. Yeah. Make sure that you have the A minor triad under your fingers in each hand. And then we are starting. Root note, fifth. Next chord: root note, fifth. Now G major: root note, fifth. And then E minor: root note, fifth. Wonderful, right? Doesn't this sound very dreamy and open?
So, let's try this again a little bit faster. 1, 2, 3. 1, 2, 3. 1, 2, 3. 1, 2, 3. 1, 2, 3. 1, 2, 3. 1, 2, 3. 1, 2, 3. 1, 2, 3. 1. Wonderful.
Simple improvisation with chord tones
And now comes the fun part. In the right hand, just choose any note from the chord. We will improvise a little bit now, and you will see, it's so simple. So here you see we have some special notes in there, the cross notes, and that just means that you can choose freely which note you want to take. Let's start with A minor. Here you can choose any note from the chord. You can choose the root, the third or the fifth. And you only have to make sure that your hand is already in the right position.
And also for the next triad, yeah, just choose one of the three notes freely. And for G major also, you can take the root or the middle note or the top note. And for E minor also, just choose one of these three notes randomly. I will play you an example. Yeah, but you could also choose another order of the notes, like...
And you will notice it always sounds good. You can't really play a wrong note here. And that's already your first free improvisation. So just experiment a little. Try different notes, and repeat some or change them, and let your ear guide you.
Right-hand variation
Now I will show you one more beautiful idea. You can also play the three notes of the chord one after another, like a small melody going up, for example like A, C, E, and then you let the last note ring over the chord change. Look, here you have A, C, E. Yeah. And then you stay on the E. This is very beautiful. You just play the A minor triad: A, C, E.
And then you can do the same with the three notes of the G major triad. Here you play G, B, D, and then you let the D ring out. So we are starting. 1 2 3, 1 2 3. And now the cool thing is: now we play the last note of the A minor triad, but in the left hand we are making the chord change, right? And that creates a very emotional sound. Listen. And then we are changing to the G major chord. And there also we are playing the three notes up. And now comes the chord change, already in the left hand. Beautiful, right?
Advanced idea: rhythm and extra notes
And if you are a bit more advanced, you can also add more notes and change the rhythm a little bit, and experiment more freely. For example, something like this.
And if you would like to understand how this kind of playing really works, how to build patterns, how to use chords confidently, and how to improvise in an emotional and natural way, then take a look at my online course, Modern Piano 1. It's designed for piano players who already know the basics a little bit and are ready to move from just playing exercises to truly making music. You can find more details in the video description below.
And yeah, if you enjoyed this video, make sure to subscribe and give it a thumbs up too. And I'm already looking forward to seeing you in the next video.
Questions about this lesson
What is a waltz pattern?
In 3/4 time, the left hand plays the root of the chord on beat 1 and the other two notes together on beats 2 and 3. That "1, 2 3" gives you the typical waltz feeling.
Which chords does this waltz use?
A minor, F major, G major and E minor, two bars each.
How do I use the sustain pedal in a waltz?
Press it down with the first note. Each time you play the root of a new chord, lift the pedal and press it down again, very quickly.
Can I play wrong notes when I improvise here?
Not really. If your right hand only uses the three notes of the chord your left hand is playing, it always sounds good. That's already your first free improvisation.