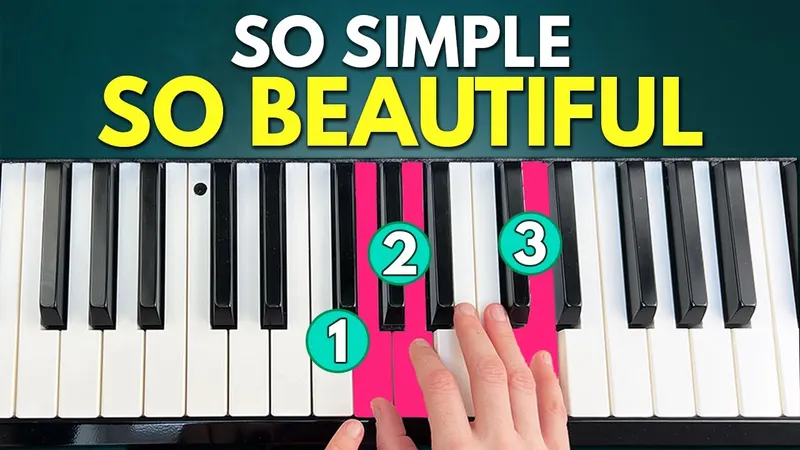
Lesson summary
You play four chords, C major, A minor, F major and G major, broken up in a simple pattern: all three notes twice, then two. Then comes the trick: the second time round, you swap one chord note for its neighbour, the white key just below or above it. First you do this with the root, then with a second pattern from the top down and the fifth. To finish, you skip a neighbour, use two, and mix the ideas into your own improvisation.
- Four chords that are easy to move between
- Two broken-chord patterns, up and down
- The neighbour trick for the root of each chord
- The neighbour trick for the fifth
- Three more ideas for even more variation
- How to mix the ideas into your own improvisation
Before you start
How to play a chord of three notes (a triad) with your right hand and single notes with your left. You don't need any experience with improvising.
An acoustic piano or a digital piano.
About 15 minutes a day. Get each pattern nicely under your fingers before you invite the neighbours.
Step-by-step guide
Here's what the video covers, in seven steps. Click a time to jump straight to that part.
-
Pattern 1: break up the chords
Play the C major triad (C–E–G) one note at a time from the bottom to the top, then again, and then only the two bottom notes: C–E–G, C–E–G, C–E. For A minor, move your hand two white keys down, so your thumb is on A; for F major, two more white keys down; for G major, one white key up. The hand shape always stays the same. Repeat it until it's nicely under your fingers.
CAmFG
-
Add the left hand
Your left hand plays the root of each chord: C with your thumb, A with your third finger, F with your fifth finger and G with your ring finger. If you want a fuller sound, play octaves instead.
-
Invite the lower neighbours
Look at the root of each chord. Its lower neighbour is the white key just to the left, its upper neighbour the one to the right: for C, that's B and D. Play the chord up once as usual, and the second time replace the root with its lower neighbour (B–E–G for C major), then finish with the two bottom notes as before. On A minor the lower neighbour is G.
-
Invite the upper neighbours
Now the same with the upper neighbours: the second time up, replace the root with the white key to its right, D for C major and B for A minor. Use your index finger for the neighbour note. This brings really beautiful colours into the pattern.
-
Pattern 2: from the top down
Same chords, opposite direction: start on the top note and play all three notes down, twice, then only the two upper notes. For C major that's G–E–C, G–E–C, G–E. Then add the left hand.
-
Neighbours of the fifth
Now focus on the top note of each chord, the fifth. The second time down, replace it with its lower neighbour: for C major, play F instead of G, with your ring finger, and finish with G and E. Then try the upper neighbour: A instead of G. Do it on every chord, with both hands.
-
Skip one, use both, mix and match
For more variation, skip the neighbour and go one house further: replace the G with a B. For this idea, play the triads with fingers 1, 2 and 4 instead of the usual 1, 3 and 5. Or use both upper neighbours: on C major, the G, then the A, then the B. Then mix and match the ideas. Don't overthink it: just have fun with it.
 Enjoyed inviting the neighbours?Modern Piano 1In my course I show you step by step how to improvise beautiful melodies at the piano, using chords and patterns instead of sheet music.Learn more about the course →
Full transcript
Prefer to read along? Here's everything I say in the lesson. Click a time to jump to that moment in the video.
Video transcript · about 2,400 words
Intro
Improvising with chords on the piano. How does that work, and how can I bring in more variations? If that interests you, then definitely stay tuned, because in this video I will show you a super simple exercise that already makes you sound like a real pro, even if you haven't been playing piano for a very long time. And if you are new here on the channel, don't forget to subscribe, and feel free to give this video a thumbs up right now.
And before we start, I have a little surprise for you, because there will be a Black Friday special this year and you will have the chance to get a discount on my Modern Piano 1 course. So, make sure to check the link under this video. And I have another surprise for you, because today it's my birthday. And so, I prepared an extra beautiful PDF sheet for this lesson. And you can download this for free, and you will find the link below in the video description.
Pattern 1: from the bottom up
So, let's begin. A simple way to improvise on the piano works through the chords. And now I will first of all show you a pattern that we will use for this exercise. And we will start with the C major triad. But we won't play all the notes at the same time. We will break up the chord now.
And we will play the three notes from the bottom to the top once, like this. And then again. And at the end, once more, just the two bottom notes. So, like this. Okay. Just repeat this a few times in a row until it's really nicely under your fingers.
And now we do the same with the A minor chord. And for this, we will move our hand, that had been here before on the C major chord, just two white keys down, until we land on the A with the thumb. So the shape stays the same. And now we have our A minor chord. And again, we break up the chord. Now we will start from the bottom to the top, first time, and second time, and in the end the two lower notes again. Okay, like this.
Then the next chord is the F major chord. And here we can again simply move our hand just two white keys down, until we land on the F with the thumb. Okay. And there we have the F major chord. And then we do exactly the same. We break up the chord. And then the next chord is the G major. And for the G major, now we just have to move one white key up. Okay? The shape stays the same. And there we have the G major chord. And there we will do the same.
Okay, I would say let's repeat this once again, all chords together, just with the right hand. 3 and 4 and. A minor, F major, G major. Wonderful.
And when that works, then we now bring in the left hand. And here you can play the root notes for each chord. That means we just begin with the thumb on the C. Then we take the third finger for the A, the fifth finger for the F and the ring finger for the G. Okay, let's put both hands together now. 3 and 4 and. A minor, F major, G major.
And if you want it to sound a bit more full, then you can also use the octaves in the left hand. That's up to you. With the octaves, it would sound like this.
Improv trick: the root
And now comes the trick. Now we come to our first exercise. And so that the whole thing does not become boring, we will invite our neighbours today. What do I mean by that? We focus now always on the root notes of the chords. For the first chord, for the C major, that would be the C. Okay?
And now there are two neighbours that we have: once the neighbours that live to the left of us, here on the key B, and once the neighbours that live to the right of us, so on the D. Okay, let's just say the neighbours to the left of us are our lower neighbours, and the neighbours to the right are the upper neighbours.
Exercise 1: lower neighbours
And in this first exercise, we will now invite our lower neighbours. And we do that so that we include them now in our pattern. So for that, we just change it a little bit. We start with playing first the C major triad once upwards, like we already know it. And then when we repeat it, this time we will replace the root note C by our lower neighbour, the B. Okay? And then just repeat the remaining notes, and in the end one time C and E again.
So first time normal, second time replace the root note with the B, and then just the two lower notes. Okay. Then we do the same now with the A minor chord. Again we go up once normally. And now the second time we replace the root note again by its lower neighbour. That's the G, right? Okay. And then second time up. And last time, A and C again.
And now we do exactly the same principle with the F major triad. One time up, then replace the root with the lower neighbour. One last time, F and A. And then the same thing with the G major triad. We go up all three notes once. Replace the root the second time with the lower neighbour.
Okay, let's do this together. Only the right hand alone. 3 and 4. And now with the left hand together. Okay. So, here you can play the root notes or the octaves. That's completely up to you, whatever is more comfortable for you. By the way, the sheet music for this tutorial is linked down in the video description.
Exercise 2: upper neighbours
Exercise number two. Now we will do the whole exercise again, but this time with our upper neighbours. Okay, that means those that live to the right of us. We will start with the C major chord. And here the right neighbour of the root is the D. Okay. And now we again start playing all three notes up once, normally.
And the second time we go up, we replace the root note C with our upper neighbour, the D. And in the end, C and E again, like this. Just use your index finger to play the upper neighbour note. Same thing with A minor. Here the root note is A, so the upper neighbour is the B. Okay. So one time normal, all three notes up. Second time we replace the root with the upper neighbour, like this.
Same thing with the F major, and on G major. And like this we are really getting beautiful colours in there. Let's repeat, just the right hand alone. 3 and 4 and. A minor, F major, G major. Okay, let's add the left hand.
Pattern 2: from the top down
So now comes another pattern, pattern number two. Here we have exactly the same chords, but this time we play the chords not always from the bottom to the top, but exactly the opposite. We start with the highest note. That means for the C major we start now with the top note, with the G, and play all three notes down. And a second time, and then the last time just the two upper ones, like this.
Okay. And the same thing we will do with A minor, just two times down. Next on the F major. And now the G major. Okay, let's add the left hand now.
Improv trick: the fifth
Okay. So this is our new pattern now. And now for this new pattern, I also have two great tricks for you that you can easily apply to this chord progression, because it's time again to invite our neighbours. But this time we do not take the neighbours that live right and left of the root note. This time we will focus on the highest note of the chord. We will focus on the fifth.
Okay. And the fifth also has lower neighbours that live to the left of us and upper neighbours that live to the right of us.
Exercise 1: lower neighbours of the fifth
So let's begin now and first invite the lower neighbours into our beautiful piano pattern. That means on the first chord, on the C major chord, we now play again once completely normal from top to bottom. And now the second time, when we play down, we will replace the highest note by the lower neighbour. The lower neighbour of the G is the F. Okay? And you can play this with the ring finger.
And then in the end, just one time G and E again. So I will repeat this: ring finger. Okay. So this is our new pattern. Then we do the same with A minor. Replace the highest note with the lower neighbour. Then F major, ring finger, and then G major. We start again from the top and then replace the top note with the lower neighbour.
Let's do this once together. 3 and 4 and. Okay. So, let's bring in the left hand. And this really brings a beautiful colour into our playing.
Exercise 2: upper neighbours of the fifth
And now finally comes the second exercise, exercise number two. Here we invite the upper neighbours. And we do that now again with the same principle. We start on the C major chord and we will focus on the top note. Okay? And so the upper neighbour is the A this time. So we start playing all three notes from top to bottom. And the second time we will replace the fifth with the upper neighbour. Okay? Like this.
Same thing on A minor. Here, this is our top note, and this is the upper neighbour. Next chord, F major, also the same. And G major. Let's do this with both hands right away. And so on and so on.
And if you haven't downloaded the free sheet music yet, make sure to grab it now, because I think you're really going to love it. And the link is down in the video description. And now make sure to stay until the end, because now I have some nice extra tricks for even more variation. You will almost sound like a pro at the end of this lesson. Trust me.
Idea 1: skip one
So the great thing is that with this exercise, you can really get creative. Let's focus again on the fifth of the chords, but this time we will skip the neighbours that live right next to us, and we go one house further away. And maybe this is because with those neighbours right next to us, it's getting boring. And therefore, we simply take the ones who live one house further up the street.
And then we can do exactly the same principle. We go down all the notes. And now we replace the highest note with the B. Look how beautiful this sounds. And for this exercise, I would suggest you take the fingers 1, 2 and 4 for the triads. So we are playing this like this. Also the A minor like this, also the F major like this, and also the G major with this fingering.
So this is really an exception. Normally I always say take 1, 3 and 5, but for this particular exercise we take 1, 2, 4 for the triads. So we are playing all three notes down. Then the second time we replace the highest note with the B, and then just play the remaining notes of the C major triad, and then in the end just one time G and E. Okay, this is the pattern.
And this we will do also with the A minor triad, with F major and G major. Okay, let's look how this sounds with both hands together. And I think this is really lovely. So, new neighbours, new sounds.
Idea 2: both upper neighbours
Or what else we could do is that we simply invite both neighbours that live to the right. So we look at the highest note of the chord, which in C major is the G. And then we take the next neighbours, that live on the A, and the next neighbours, that live on the B. And then we can combine this with our pattern. For example, like this.
Okay. So here I also take the fingers 1, 2, 4. Then I take the A and then the B. Okay. And this sounds really beautiful. And we can do this with the other chords too. Okay. With F major, just one note higher, and another note higher. And the same thing with G major. Together with both hands.
Idea 3: mix and match
And this is really, really beautiful. And the cool thing is that you can also mix and match these opportunities. For example, I could make something like this. So, you see, the opportunities are endless. And don't be afraid to try something new. That's always what I want to encourage you to do: that you take this exercise and become creative with it. And don't overthink it. Just have fun with it.
And if you want to learn more about how to improvise on the piano, there will be a Black Friday special this year and you will have the chance to get a discount on my Modern Piano 1 course. So, make sure to check the link under this video.
And make sure to check out this video next, because in this video I will show you step by step how you can play beautiful melodies spontaneously on the piano. And I think you are really going to like it. And yeah, you will get so many new ideas that are easy to apply in your own playing. And yeah, I really think you will absolutely love it. So, click here to see the next video, and I'm looking forward to seeing you there.
Questions about this lesson
What are the "neighbours" of a note?
The white keys right next to it. The lower neighbour is the key to the left, the upper neighbour the key to the right. For C, that's B and D; for G, it's F and A.
Which chords does this lesson use?
C major, A minor, F major and G major. Your right hand keeps the same shape and only moves: two white keys down from C to A, two more to F, then one up to G. Your left hand plays the roots, C, A, F and G.
I've never improvised. Is this for me?
Yes. You start with a fixed pattern and change just one note at a time, so you always know what to play. Little by little you get more freedom, until you mix the ideas yourself.
Which fingers should I use?
Normally 1, 3 and 5 for a triad. For the neighbour notes, I use the index finger for upper neighbours of the root and the ring finger for the lower neighbour of the fifth. For the "skip one" idea, play the triads with 1, 2 and 4.