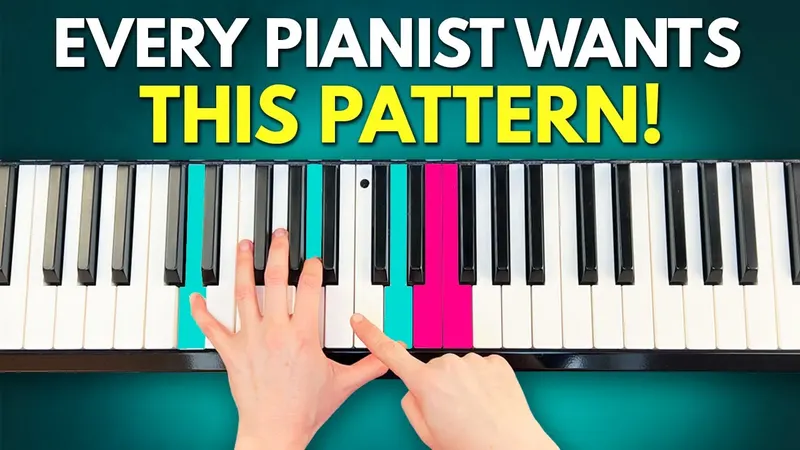
Lesson summary
You only need a melody and chord symbols: C major, A minor, F major and G major. Your left hand starts with just the root note, then root and fifth, then the 1–5–8 shape (root, fifth, octave). That shape becomes four more patterns: broken up and down, in eighth notes, as root plus fifth and octave, and as an emotional arpeggio, with a low bass and the triad in between. At the end you hear how the patterns change the mood of real pop songs.
- Eight left-hand patterns, from easy to pro
- The 1–5–8 shape and the best fingering for it
- How to move each pattern between the four chords
- A trick for coordinating both hands
- How to play from a melody and chord symbols
- How the left hand changes the mood of a song
Before you start
The chords C major, A minor, F major and G major (triads: three notes) and how to count 1 and 2 and 3 and 4 and. You don't need to read the bass clef.
An acoustic piano or a digital piano. For pattern 8, a sustain pedal makes it sound even more beautiful.
About 15 minutes a day. Learn one pattern at a time, first with the left hand alone, until you can play it without thinking.
Step-by-step guide
Here's what the video covers, in seven steps. Click a time to jump straight to that part.
-
The melody and the chords
The lesson uses a simple melody and the chord symbols above it: C major, A minor, F major and G major. The melody starts with your right thumb on C, repeats in the first three bars, and ends with B and D in the last bar. Count 1 and 2 and 3 and 4 and. Watch the melody in the video at 1:02.
CAmFG
-
Patterns 1 and 2: root, then root and fifth
The easiest thing your left hand can play is the root note of each chord: C, A, F, G. It always works, in any octave. Next level: the root and the fifth together, with your little finger and thumb (count 1 2 3 4 5 up from the root): C and G. Keep the same distance and move two white keys down to A minor, two more to F, and one up to G.
-
Patterns 3 and 4: the 1–5–8 shape
Add the root again one octave higher: 1–5–8, with fingers 5, 2 and 1. Play it together on every chord: it already sounds fuller. Then play the same notes one after another, going up, and back down to your index finger, before you move to the next chord. If coordinating both hands is hard, draw lines in the sheet music where the two hands play together.
-
Pattern 5: eighth notes
For a fuller, more lively sound, keep the 1–5–8 shape and play all three notes going up once, then go back and forth between your thumb and index finger until the bar is full, counting 1 and 2 and 3 and 4 and. Practise the left hand on its own until you know the shape and the order of the notes by heart.
-
Pattern 6: root, then fifth and octave
Same shape, new order: play the root alone with your little finger, then the fifth and octave together with your index finger and thumb. Count 1 2 3 4: index finger and thumb come on 2 and 4. Played a little faster, this is a really nice rhythm.
-
Pattern 7: a low root and the triad
Play the root very low, then jump up and play the whole triad around middle C, in the same rhythm: the low root on 1, the triad on 2, 3 and 4. It adds more depth to your playing. If the jump feels too far, watch the easier version at 18:25.
-
Pattern 8, and real songs
Play 1–5–8 as an arpeggio, go back to your index finger, then move your thumb one white key higher, back to the index finger, the thumb one key higher again, and back to the index finger. Use the sustain pedal. Then try the patterns under real songs with a 1–6–4–5 progression: choose the one that fits, and change the mood of a song just by changing the left hand.
 Want the patterns to feel like second nature?Modern Piano 1In my course you learn to play freely with chords and inversions and to improvise melodies that really touch the heart. It's a wonderful addition, or alternative, to learning only from sheet music.Learn more about the course →
Full transcript
Prefer to read along? Here's everything I say in the lesson. Click a time to jump to that moment in the video.
Video transcript · about 3,100 words
Intro
The big question is always the same: what do I actually play with my left hand? Hello and welcome. In this video, I will show you eight left-hand patterns that instantly add more variety to your piano playing, and I really wish I had learned these left-hand patterns earlier.
If you are new here to this channel, don't forget to subscribe and give this video a thumbs up. You will find many great piano tutorials here, all about playing with patterns and with chords. And I will show you all the things you usually don't learn in normal piano lessons. And for today's video, you can also download a free PDF with all the exercises. You can find the link below in the video description. So, let's start right away.
The melody
So here you can see a melody and the chord symbols that are above, and first of all we will have a look at the melody. Okay. And then we will see what we can play in the left hand. Okay. We are starting with the thumb on the C and we are playing 1 and 2 and 3 and 4 and. Okay. Then in the next bar you are repeating the same. 1 and 2 and 3 and 4 and. And in the third bar again, 1 and 2 and 3 and 4 and.
And then in the last bar you are playing the B and the D. Okay? So 1 and 2 and 3 and 4 and. Let's repeat this together. So 3 and 4 and. 1 and 2 and 3 and 4 and. 1 and 2 and 3 and 4 and. 1 and 2 and 3 and 4 and. 1 and 2 and 3 and 4 and. And then you can repeat and repeat and repeat. And this is our little melody for today.
Pattern 1: the root note
Okay. And now let's have a look at what we can do with the left hand. And the first and easiest thing you can do when you only have a melody and chord symbols is this. In the left hand, you simply play the root note of the triad. Okay? So you look at the chord symbol and then you just play the root note.
That means when you see the chord symbol for C major, then you are playing a C. For A minor, you are playing the A. For F major, you are playing the F. And for G major, you just play the G. Okay? And we will try this now. 3 and 4 and. 1 and 2 and 3 and 4 and. 1 and 2 and 3 and 4 and. 1 and 2 and 3 and 4 and. 1 and 2 and 3 and 4 and.
And isn't this amazing? This will always work, no matter if you are playing the root notes here in this octave, or maybe you want to play it a little bit higher, so that you are starting here. This will also work. Listen.
Okay. So, I think this is really beautiful, and you don't need the sheet music for this, because normally you have to read the bass clef, and it's really, yeah, not that simple. And with the chord symbols, that's such a great opportunity to play something like this without having the full sheet music.
Pattern 2: root and fifth
Okay, let's look at left-hand pattern number two. Here comes the next level. In this pattern, you play only the root note and the fifth. That means when this is the root note, then you count 1 2 3 4 5, and then you have the fifth. Okay? So you are playing this with your little finger and the thumb. And for the first measure, you are playing C and G.
Then you keep exactly the same distance between the little finger and the thumb, and you are going two white keys down to A minor. Okay? And then you are going two white keys down to F major. And then you go one white key up to G major. Let's look how this sounds together. 1 and 2 and 3 and 4 and. 1 and 2 and 3 and 4 and. 1 and 2 and 3 and 4 and. 1 and 2 and 3 and 4 and, 1. Okay.
So, this is really amazing, how this works. And I can also show you how this would look when you would notate this in the sheet music. Okay. But you see, then you really have to read, okay, what's the left hand doing? And why not make it easier? Because when you understand the principle of the triads and the chords, then it's much easier. Then you can just rely on this knowledge, and you know exactly the different opportunities for what you can do with your left hand. Okay.
Pattern 3: 1–5–8
Left-hand pattern number three. Now we come to the next level. Now we take this idea a little bit further. We use the same pattern. We use the 1 and the 5, but now we add the root again one octave higher. Okay? So we play 1–5–8. And it's best to use the fingers 5, 2 and 1 for this 1–5–8 pattern.
And now we will apply this pattern to all chords. That means for C we are starting at the root note C, and then we build the 1–5–8 pattern. Okay. Now we take this shape and go down to A. Then we go down to F. And then we go one white key up to the G. Okay. And now we will have a look at how this sounds with the melody together. Okay. Let's start.
And I think with this 1–5–8 pattern, it starts to sound a little bit fuller, okay? Because we are playing three notes at the same time and not only two notes. And just a quick reminder: if you haven't downloaded the PDF with the notes yet, now is the best time. The download link is in the video description below, and then you can have a look at how this would look written in sheet music. But you can also see how the system behind it works. Okay.
Pattern 4: 1–5–8 up and down
Now we are going to pattern number four. We are going to the next level now. And I think this is another beautiful idea for what you can do with your left hand. For this pattern, we take exactly the notes we had before, the 1–5–8 pattern. Okay? But this time, we don't play them all together. We play them one after another, like going up: first note, second note, third note, and then we go back down with the index finger.
And then we move to the next chord, to the A minor. Okay? Now to the next chord, and to the next chord. So you just take the notes from the 1–5–8 shape and play them up and down. Okay. So now let's add the right hand.
Okay. And here you can see how it's getting more and more complicated with the coordination between both hands. And this is why I showed you the sheet music for the left hand, because then it's easier to see, okay, what is going on here? And this is the only advantage when you really can read the notes, that you can see, okay, when do we play both hands together? When comes the right, when comes the left hand?
And playing only with chord symbols, this is something that is a bit more advanced. Then you really have to be familiar already with your left-hand patterns, with the coordination and everything. And what you can do, when you still have problems with the coordination, is that you draw in these lines here. Okay? Because like this you can see, okay, when do both hands come together?
And here this is difficult, because you don't play this note here, right? Because you just wait until its duration is over. And here you can see clearly, okay, the first note comes together, then just the right hand, then the next two notes come together. Now only the left hand alone. Now the right hand. And now both hands together. And now only the right thumb. Okay. Together, together, together.
And this can be a good help. So really make sure that you get the free download with the PDF sheet, and then you can make your own drawings in the sheet, and this will help you a lot.
Pattern 5: eighth notes
Now I will show you left-hand pattern number five. Now, if you want a fuller and more lively sound, you can also play this 1–5–8 arpeggio in eighth notes. Okay? And here you keep the 1–5–8 shape, and you start by playing all notes once going up, and then you move back and forth between your thumb and index finger, yeah, until the bar is full.
So we count like this: 1 and 2 and 3 and 4 and, and then you change to the next chord, to the A minor. And there you are doing exactly the same. 1 and 2 and 3 and 4. And then comes F major. 1 and 2 and 3 and 4 and. And the last one. 1 and 2 and 3 and 4 and. And then you really must be aware: then you are jumping back to C major. Okay. Let's try this out with both hands together. 3 and 4 and. And so on.
And really practise this left-hand pattern on its own, so that you really get familiar with the shape and the order of the notes, and then you can do the test. Because if you know the melody by heart and if you know the left-hand pattern, then you can have a look: okay, what would it be like if I only had the chord symbols and the melody notes? And I know, okay, I will apply pattern number five. Am I able to do this already?
Okay. Because this is the challenge, and this is all that chord playing is about: that when you see the chord symbols, like the triads here, you know, okay, you can play them however you want. You don't have to play a boring C major triad or a boring A minor triad or a boring F major or G major. No, you have the freedom, and there are so many possibilities for how you can arrange the left hand.
Pattern 6: root, then fifth and octave
Let's have a look at left-hand pattern number six now. So we are reaching the next level, and now we take the same 1–5–8 shape again, but we will change the order of the notes again. So let's prepare the 1–5–8 shape for C major first. And now you first play only the root note with your pinky, and then you play the fifth and the octave together with index finger and thumb. Okay?
And the rhythm is very simple. You just count 1 2 3 4, 1 2 3 4. That means index finger and thumb come on the 2 and the 4. And the same rhythm you are playing with the other chords too. So 1, 2, 3, 4. Then you go to F major. And then after this you go one white key up, and you are taking the same order, the same rhythm. And then we are trying this together, left hand only.
1 2 3 4. Next one. 1 2 3 4. Go to F. 1 2 3 4, 1 2 3 4. Okay. And if you want, just for practising, you can also draw your lines, and then you can clearly see which notes go together. Okay, we start. 1 and 2 and 3 and 4 and. Okay, next bar. 1 and 2 and 3 and 4 and. 1 and 2 and 3 and 4 and. 1 and 2 and 3 and 4 and. And when you are playing this a little bit faster, this is really a nice rhythm.
Pattern 7: a low root and the triad
Okay, let's make it a little bit more difficult. We are going to left-hand pattern number seven. And this is definitely the next level. Now we change it again. Here you play the root note very low. You are beginning here with the C, and then you are jumping up to the middle C, and then you are playing the whole triad. Okay?
And the rhythm: we will apply the same rhythm as we had in the pattern before. So we are counting 1 2 3 4. Then we go to the next note, which is the A. 1. And then we are going high up here. 2 3 4. Then we go to the F. 1 2 3 4, 1 2 3 4. Okay, that means when you are playing the C major here, then this is the middle C. Then you go to A minor, and there you see, here is your middle C.
When you go to F major, here is your middle C, and then here is your middle C in between. This maybe just gives you a little bit more orientation. If the way is too far and you don't get those deep root notes, then you can also play the deeper root notes one octave lower, like this. It's a little bit easier, but we are at level seven now.
And so we can try out how this works when we really play the root notes here in the lower registers. And this will add more depth to your playing. So we try out both hands together. 1 and 2 and 3 and 4 and. 1 and 2 and 3 and 4 and. 1 and 2 and 3 and 4 and. 1 and 2 and 3 and 4 and. Okay. So, really practise this. I think this sounds really nice.
Pattern 8: an emotional arpeggio
Now we are coming to our last left-hand pattern, pattern number eight. And now I have one more beautiful pattern for you that you really should know. And here again you start with a 1–5–8 pattern, and you play it as an arpeggio. That means you are going up the three notes. Then you go back to your index finger. Then you go with your thumb one note higher. Go back with your index finger. And then with your thumb one note higher, and back to your index finger. Listen how this sounds.
Play this together with me just a few times, so that you really get used to the shape. And then you can do this with all the other chords too. That means A minor: here you start again with 1–5–8. Back to the index. One white key higher, one white key higher. And then for F major, one white key up and one white key up. And for G major also, 1–5–8, and then one white key up and one white key up.
And this gives you a really beautiful and emotional left-hand pattern. And I think this will really enrich your playing. Try to use the sustain pedal, because like this it will sound even more beautiful. Now let's try out both hands together.
And here it's always the second note you play with your thumb that you will play completely alone, with only the thumb. So when you look at my hands now, every time I play both hands together, except on the third beat. Look, now comes the left thumb alone, but then together again. This takes a while until you get it with the coordination, but this is totally fine.
Using the patterns in real songs
And now comes the most important thing. In real life, you usually only have the melody written down together with the chord symbols, or you have the melody just in your head and you know the chord symbols, and that's it. These left-hand patterns need to be so familiar that you can use them instantly. And that's the real trick.
And now you've learned eight different ways to shape the left hand. Let's look at some real songs. I will show you two songs that use the same chord progression. It's a 1–6–4–5 chord progression, which appears in many pop songs. And we will apply different left-hand patterns and listen to how they sound.
Of course, not every pattern fits every song. And that's exactly the goal. You want a toolbox of patterns, so you can choose intuitively what works best, and you can make a song feel calmer or more active just by changing the left hand. And that's the beauty of these patterns, right?
The first song I want to show you is from Bonnie Tyler, Total Eclipse of the Heart. And I think you know the melody. (She sings the melody.) And then the question is, okay, what can you play in the left hand? Maybe let's try out pattern number four. Yeah. And it's just that I have the melody in my ear. And for sure you can try this out by yourself. And then it's just a coordination thing.
Or maybe we take another pattern. Let's take this one. And like this you can clearly see how you can also change the mood of the song.
And the next song I want to show you is Starship, Nothing's Gonna Stop Us Now. I'm sure that you also know this song. (She sings the melody.) Yeah. So, we just take the melody, play it by ear, and then we can, yeah, try different left-hand patterns. Maybe let's take this one here. Or let's take the more complicated pattern, number seven. Yeah, just to show you an example.
And the biggest challenge is that in most pop songs, melodies often have syncopations and offbeat rhythms. And combining that with a left-hand pattern is the trickiest part. And that's why these patterns really need to be like second nature, you know, that you really know them by heart, that you can play them automatically. And that's it.
I hope you enjoyed this tutorial. And if you want to learn more about playing piano with chords and creating music without sheet music, then check out my online course, Modern Piano 1. You will find the link in the video description below. And this course is for everyone who learned piano only from sheet music, or thought that this was the only way to learn piano.
And in the Modern Piano 1 course, you learn how to play freely with chords and inversions and how to improvise beautiful melodies, melodies that really touch the heart. And that part is often missing in traditional piano lessons, you know. So this course is a wonderful addition or an alternative to classical piano teaching. So I would love to see you there. And now have fun practising, and see you in the next one.
Questions about this lesson
What is the 1–5–8 pattern?
The root (1), the fifth (5) and the root again one octave higher (8). For C major that's C, G and C. Play it with fingers 5, 2 and 1, and it becomes the base for most of the patterns in this lesson.
Do I need to read the bass clef?
No. You look at the chord symbol, find the root and build the pattern from there. That's much easier than reading every note of the left hand.
Which pattern should I start with?
Pattern 1, just the root note: it always works. Then go up level by level. Each pattern builds on the one before, so take your time and practise the left hand alone first.
How do I use these patterns in a song?
In real life you usually only have the melody and the chord symbols. Choose a pattern that fits the mood, and practise it until you can play it without thinking. Then the hardest part is coordinating it with the melody's rhythm.